Oracle ERP Update 25D: Financials
Medium Impact

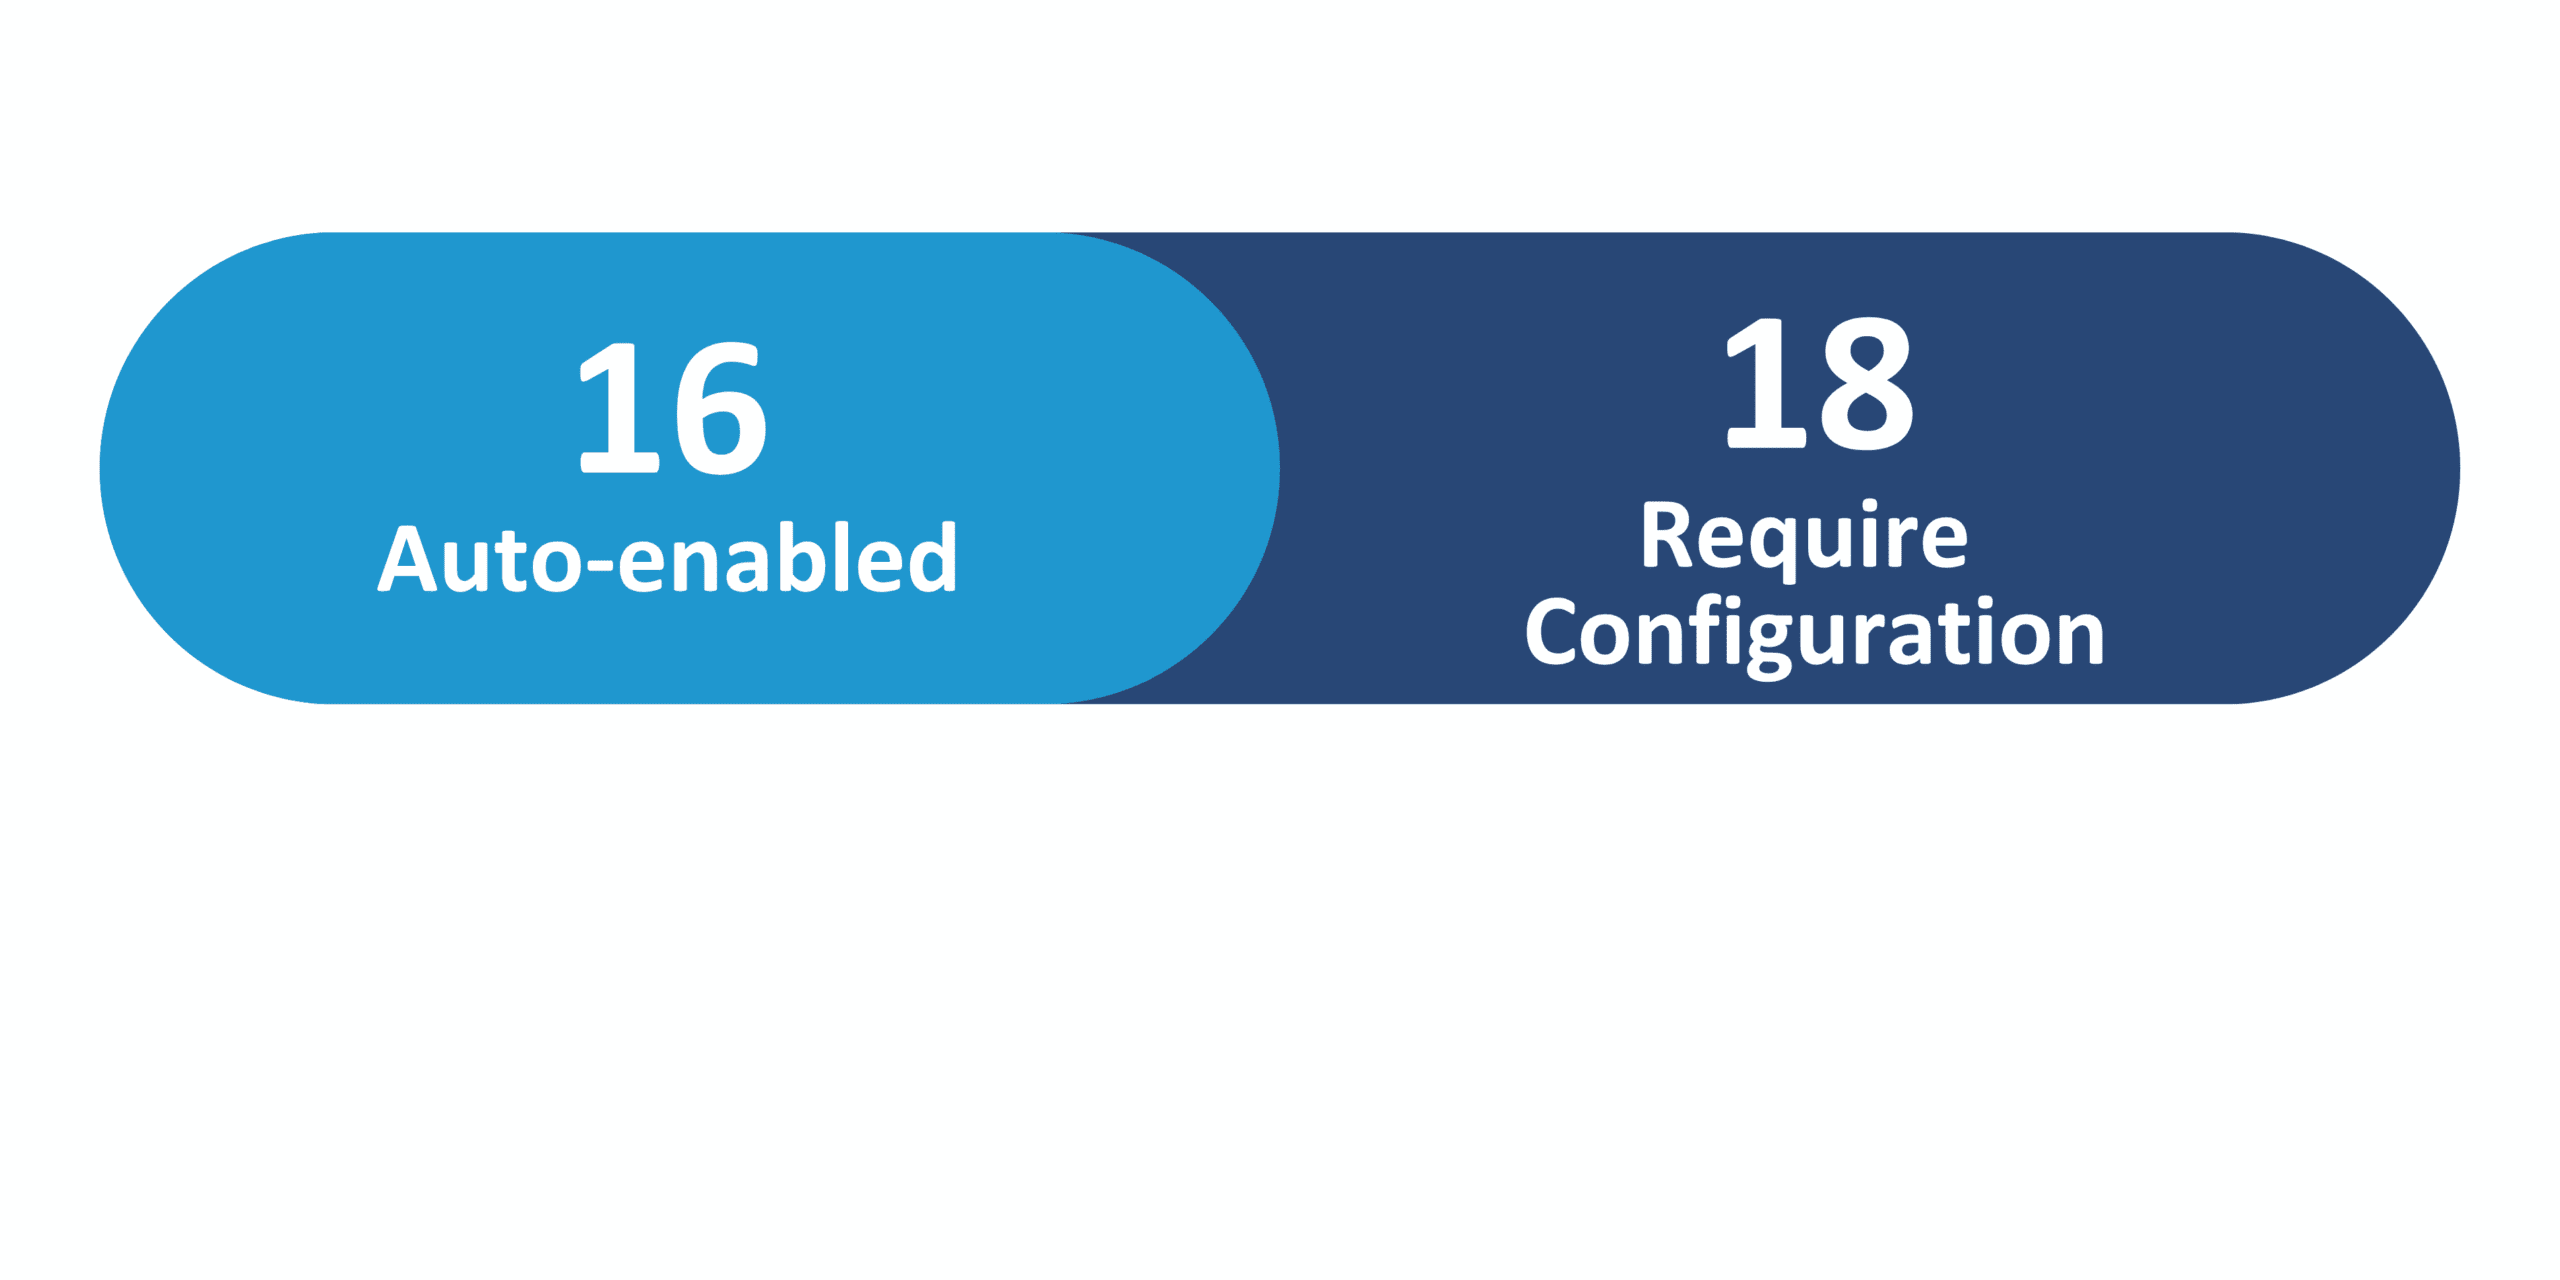
Feature Enablement
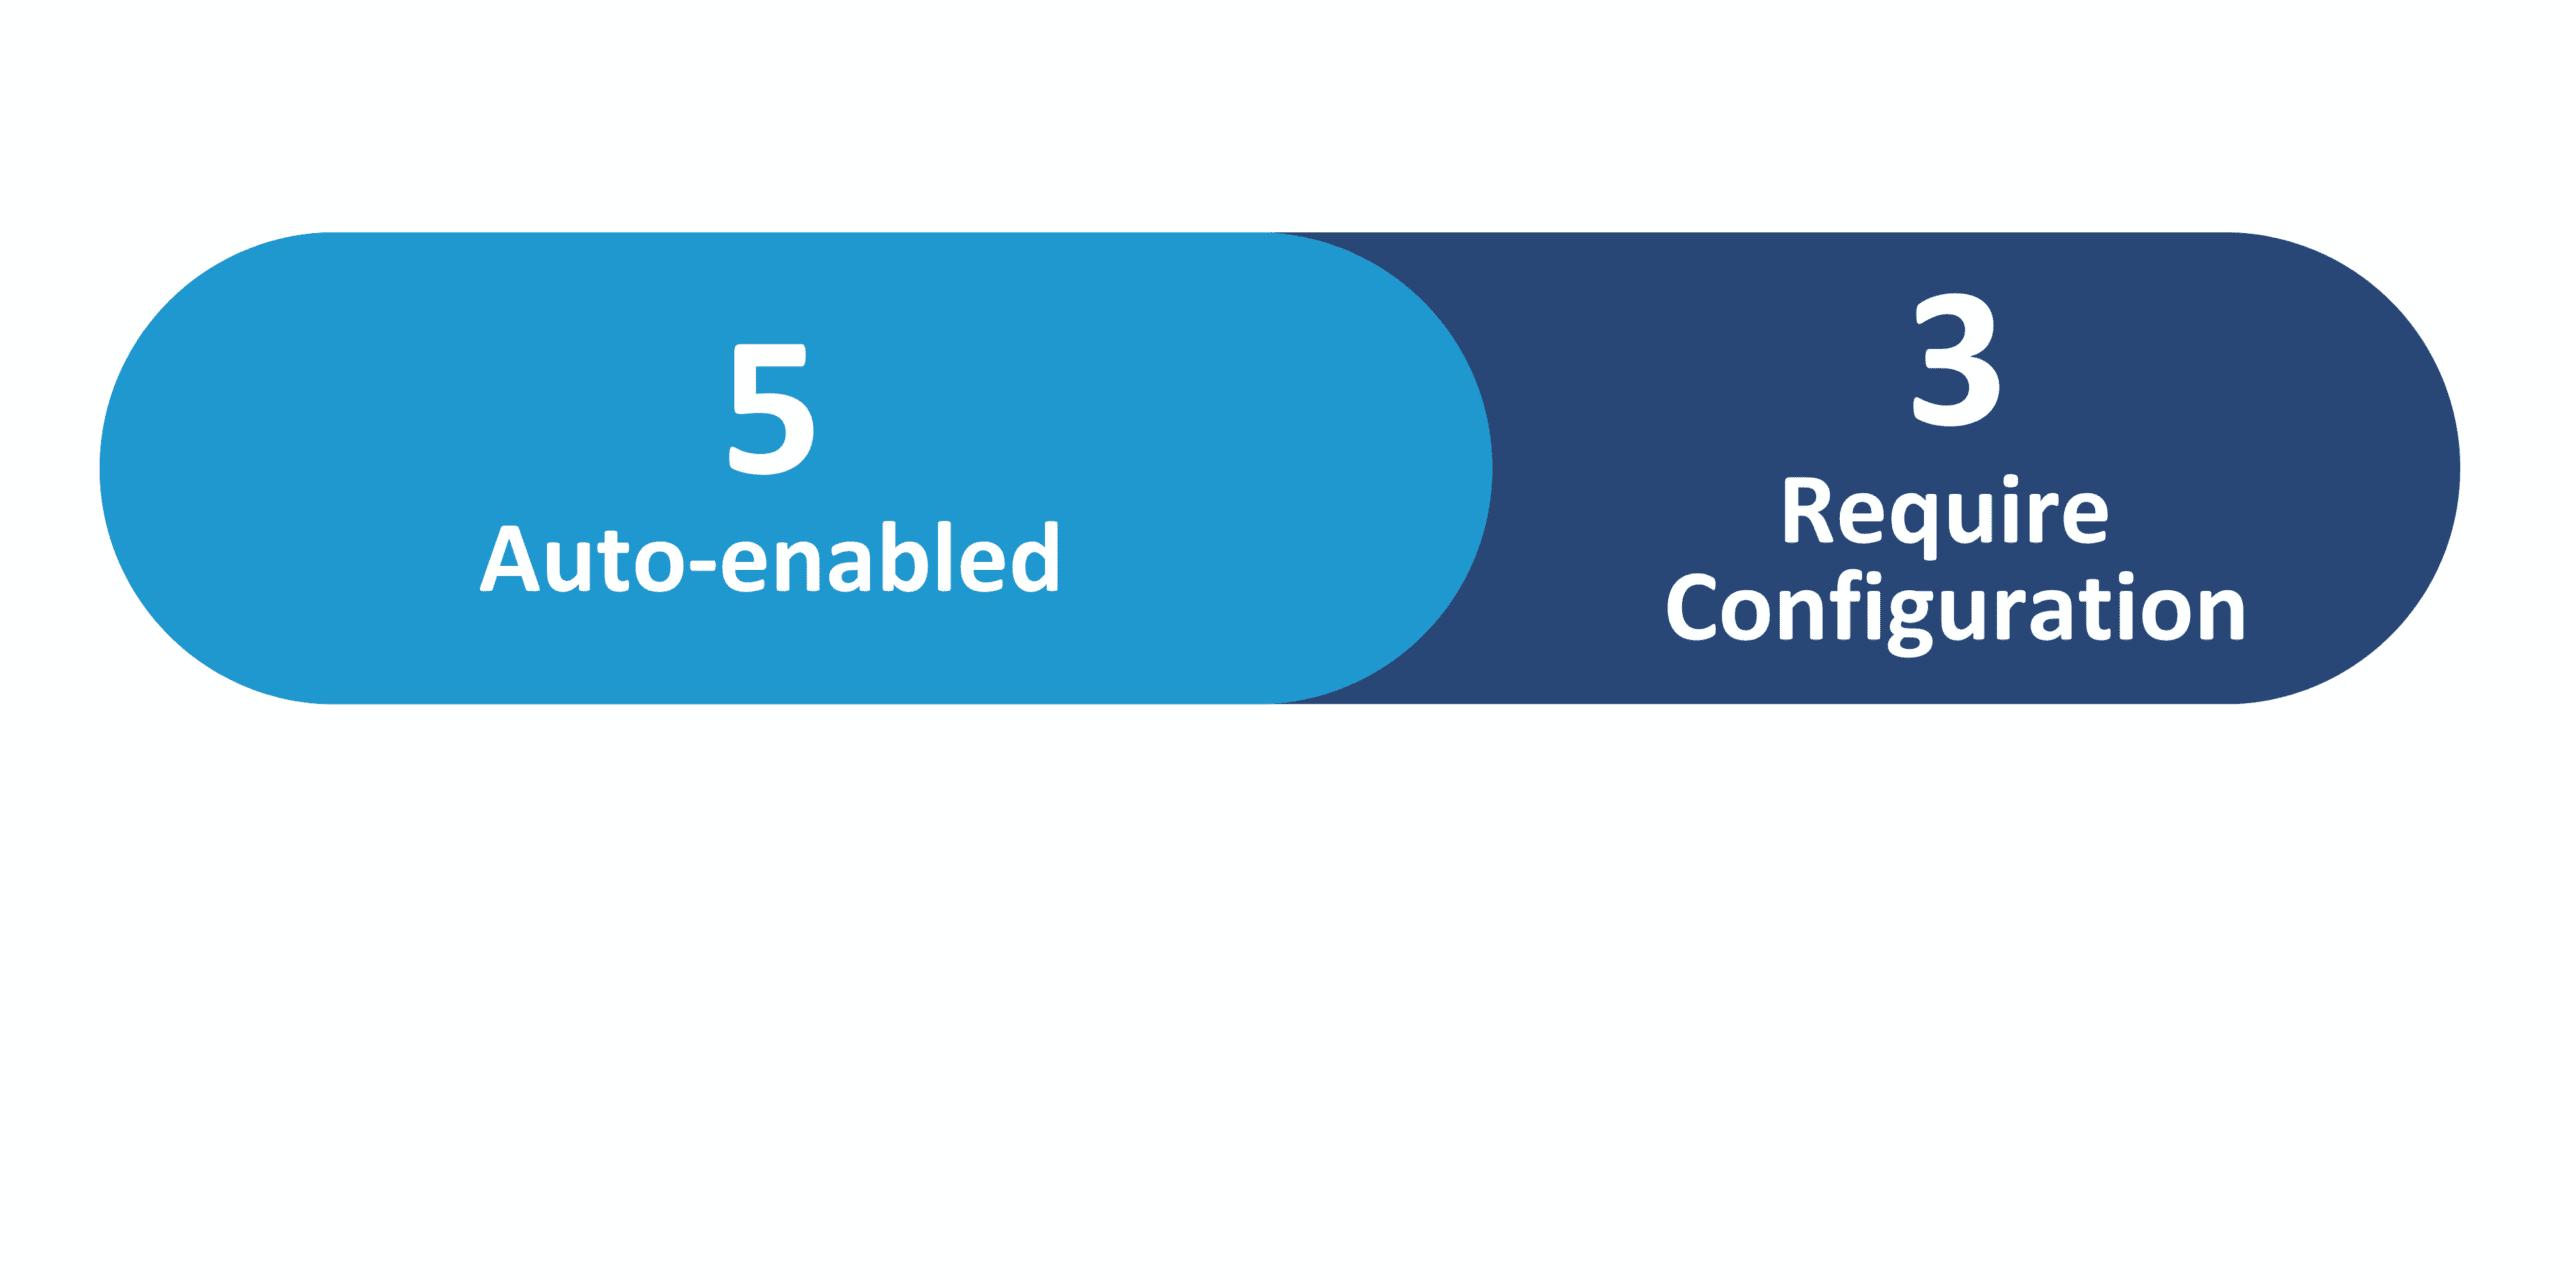
Redwood Features
25D Update Features Covered:
- Touchless Mobile Expenses
- Transaction Receipt Method for Customer Payments in Bill Management and Collections
- AI Agent: B2B Message Format Converter
- Include User-Defined Shipment Attributes in Outbound Shipment Notification Messages Using a REST Resource
- Send B2B Messages to Your Partners Using OAuth 2.0 Authorization
- Automated Tax Registration Number Validation for Suppliers
- Redwood: Manage B2B Message History Using a Redwood Page
1. Touchless Mobile Expenses


Touchless Mobile Expenses with the Redwood responsive experience is a new approach for expense management to reduce manual expense entry, ensure compliance, and accelerate reimbursement. Employees simply forward receipts, and Oracle Expenses Agent automatically matches them to corporate card charges to submit and process expenses with minimal manual effort. Employees no longer need to manually create expenses, select expense types, provide repetitive information from lengthy lists, or attach receipts.
To learn more about this new feature, check out the Oracle demo of these capabilities:
Steps to Enable:To Enable this new feature, you must Request Enablement as an early adopter. Details found here: https://community.oracle.com/customerconnect/discussion/897553/touchless-mobile-expenses-for-25d-are-you-interested
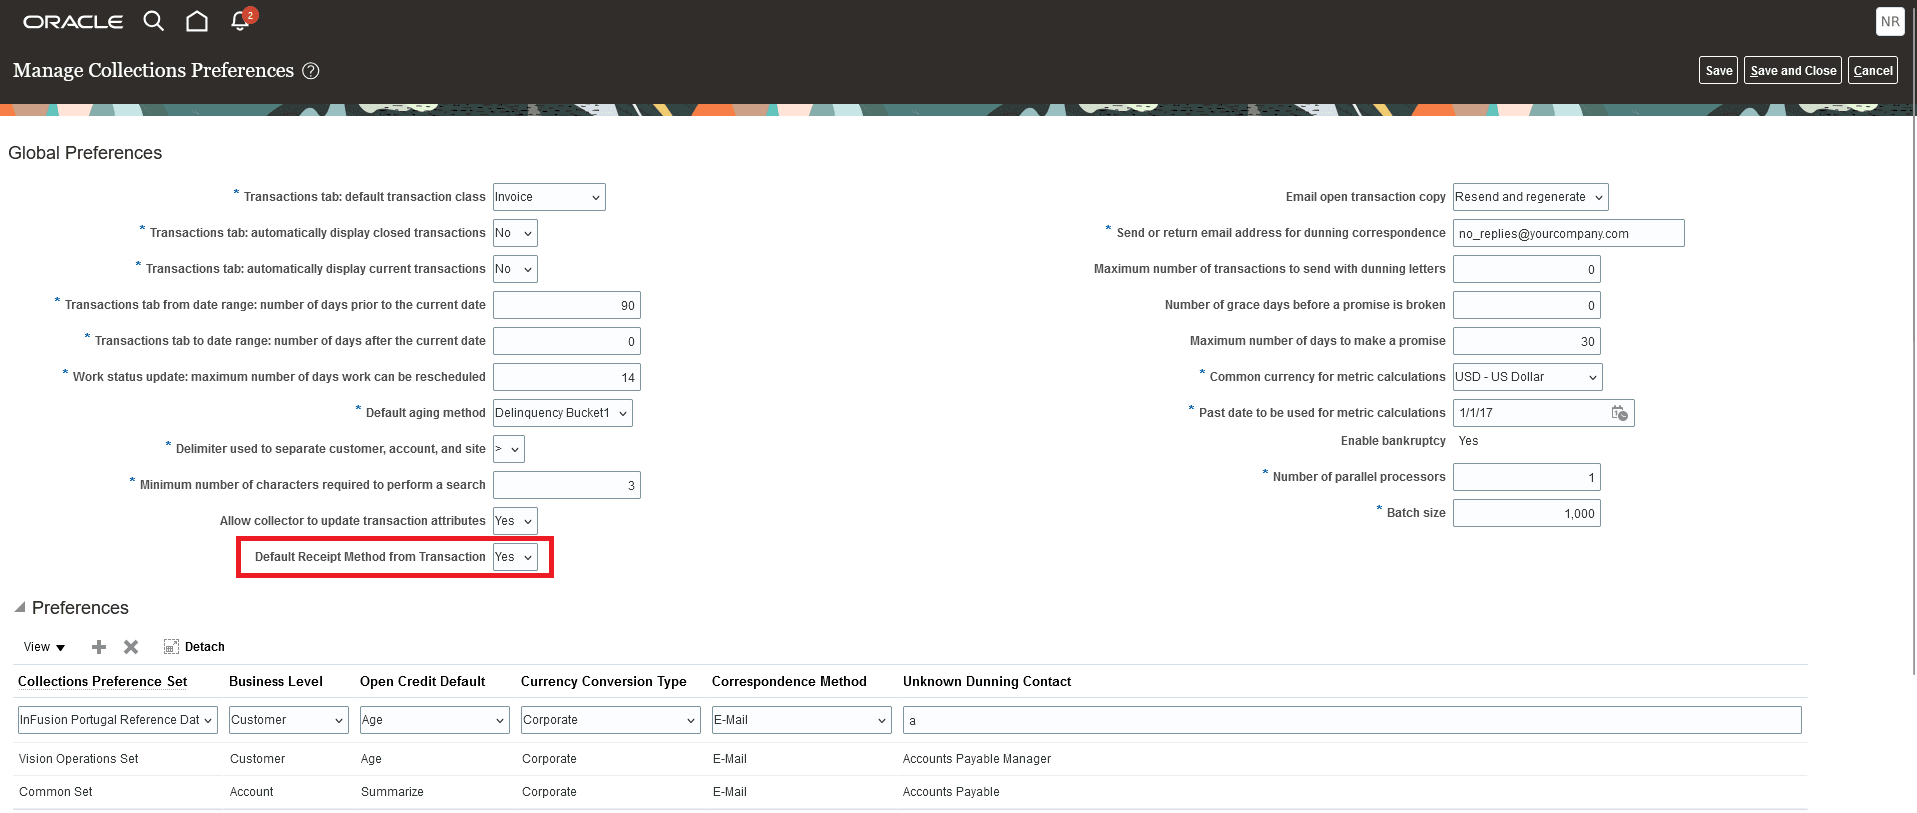
2. Transaction Receipt Method for Customer Payments in Bill Management and Collections
Quick Notes:

This enhancement enables the option to default the remittance bank account defined on the receipt method of the transaction:
- in Manage Bill Management System Options for making payments from Bill Management dashboard.
- in Manage Collections Preferences for making payments from Advanced Collections.
Previously, the primary remittance bank on the receipt method defined in Receivables System Options was used for customer bank account payments.
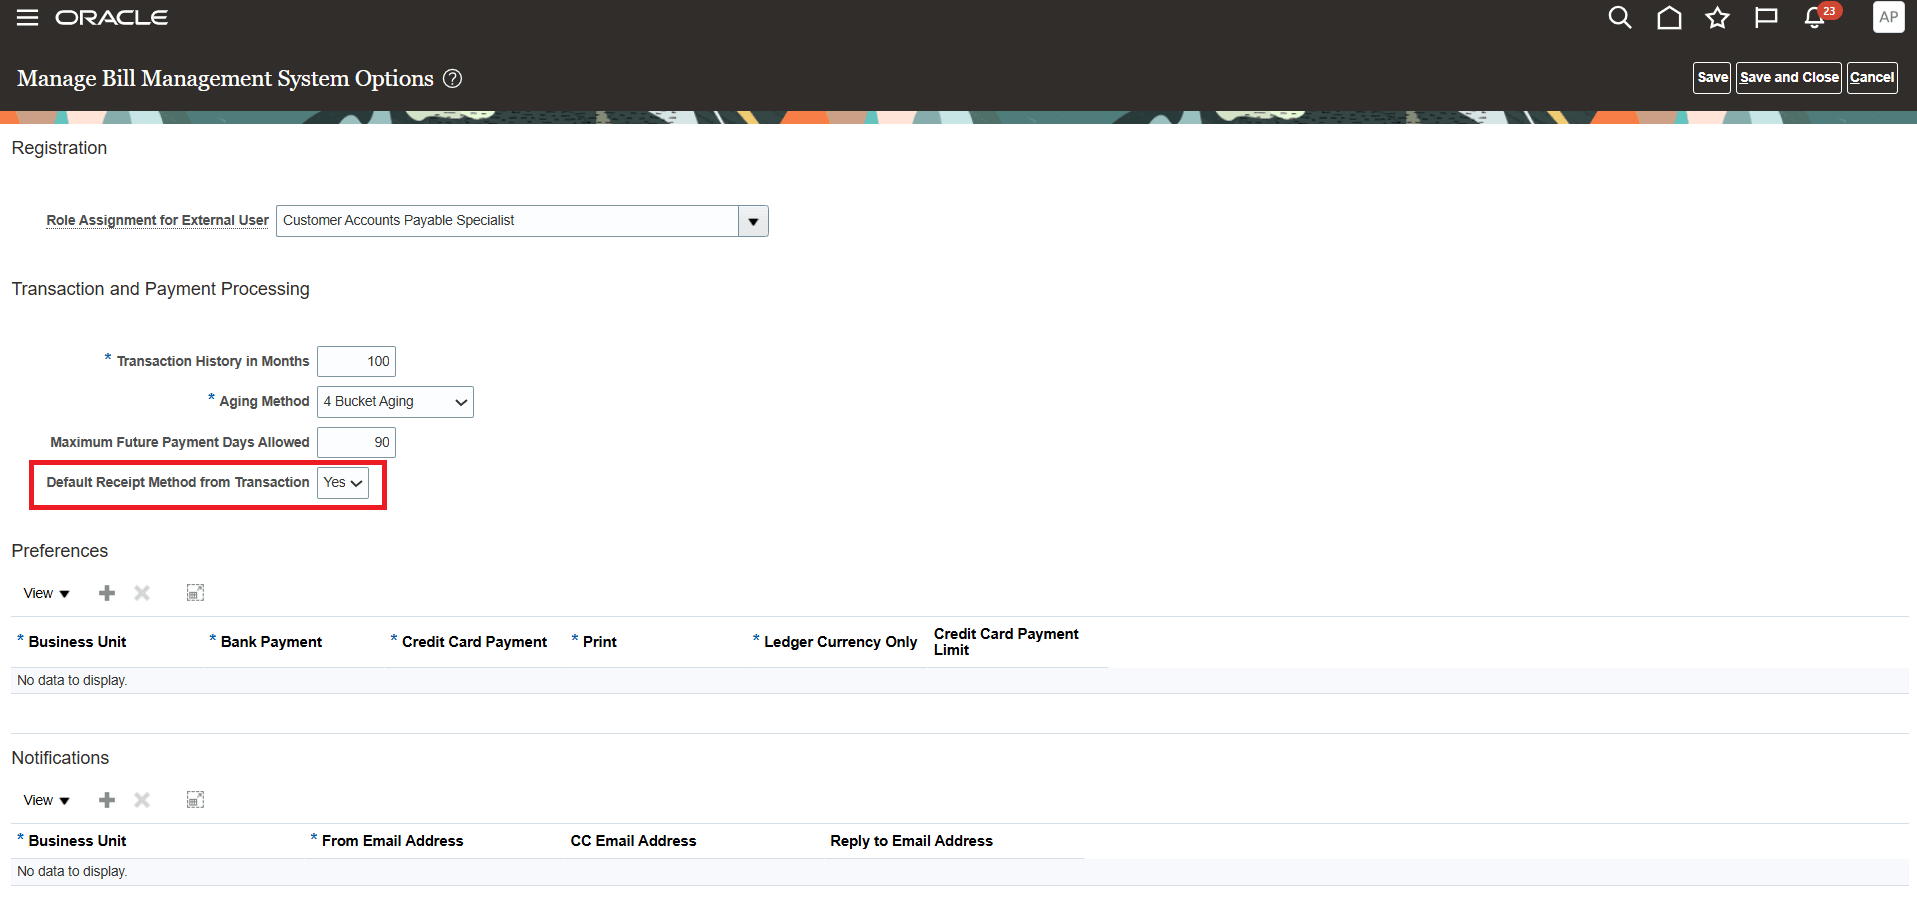
Steps to Enable:
You don’t need to do anything to enable this feature.
3. AI Agent: B2B Message Format Converter
Quick Notes:
The B2B Message Format Converter intelligently transforms data from a Fusion Application REST resource into a standard B2B message for exchange with trading partners. It supports the following message standards: OAG 7.2.1, OAGIS 10.1, and cXML 1.2.007.
Steps to Enable:
You can access this functionality by enabling the feature Simplify Configuration and Processing for B2B Messaging.
You can use AI Agent Studio to use or copy a preconfigured agent template to create Agents for your business processes. To automatically add a suffix to all artifacts in your agent team, you can Copy Template instead of Use Template. When you copy a template, you’re directly taken to the agent team canvas where you can edit the agent team settings, agents, tools, and topics. The Use Template option takes you through a step-by-step process for configuring each artifact in the agent team.
For information on using AI Agent Studio, see How do I use AI Agent Studio?
4. Include User-Defined Shipment Attributes in Outbound Shipment Notification Messages Using a REST Resource
Quick Notes:
You can now access and include any attributes available in the Shipments REST resource in your outbound advance ship notice message.
The following predefined message definitions for advance ship notice have been updated with a mapping file that contains all the attributes available in the Shipments REST resource and is used to generate the original XML payload.
- OAGIS_10.1_PROCESS_SHIPMENT_OUT_V2
- OAGIS_10.1_PROCESS_SHIPMENT_COLLAB_MSG_OUT_V2
You can include any data that’s available in the REST resource in your outbound advance shipment notice to meet specific business requirements.
Steps to Enable:
You must “Opt-In” to use this new feature:
Click Navigator > My Enterprise > New Features.
On the Features Overview page, select your offering to review new features specific to it. Or, you can leave the default selection All Enabled Offerings to review new features for all offerings.
On the New Features tab, review the new features and check the opt-in status of the feature in the Enabled column. If a feature has already been enabled, you will see a check mark. Otherwise, you will see an icon to enable the feature.
Click the icon in the Enabled column and complete the steps to enable the feature.
Offering: Manufacturing and Supply Chain Materials Management
After you opt in, perform these steps to include additional attributes in your outbound advance ship notice message:
Select Manage Collaboration Message Definitions from the task panel.
Select the predefined shipment message definition that you’re using and select Export Transformation Package. The transformation package has four folders: mappingFile, payloadTemplate, xsd, and xsl.
In the mappingFile folder, open the mapping file and find the name of the attribute you want to add to your message.
Edit the XSL file to include the additional attributes.
In Manage Collaboration Message Definitions, duplicate the predefined advance ship notice message, enter a name, and upload your modified XSL file and mapping file.
Replace your existing shipment message definition with the newly duplicated one for your trading partners or service providers.
5. Send B2B Messages to Your Partners Using OAuth 2.0 Authorization
Quick Notes:
You can now use the OAuth 2.0 authorization framework to securely send B2B messages to your trading partners. The OAuth server manages credentials so that trading partners don’t have to exchange usernames or passwords to authorize messages sent using the REST Web Service delivery method type.
Steps to Enable:
You need to enable the feature Simplify Configuration and Processing for B2B Messaging to access this functionality.
Perform the following steps:
- Create a new delivery method of type REST Web Service, and add values for the below data elements:
- Access Token URL
- Client ID
- Client Secret
- Scope
- Refresh Token URL
- Update your B2B connections with this new delivery method.
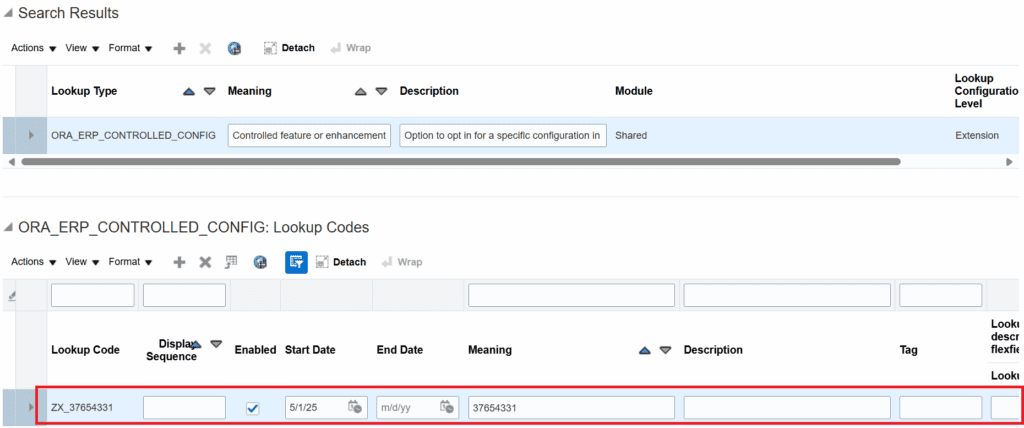
6. Automated Tax Registration Number Validation for Suppliers
Quick Notes:
Validate supplier tax registration numbers automatically against government agencies during the tax registration number creation process. Many tax authorities, government portals, and electronic invoicing service providers offer application programming interfaces to validate third-party registration numbers which are used to determine tax recoverability and report taxes.
Use the Tax Registration page to enter the tax registration number details. When you click Save, the tax registration is validated. The Tax Authority Validation Response section of the Tax Registration page displays the tax authority validation response.
Steps to Enable:
Create and enable a new lookup code ZX_37654331 for the existing ORA_ERP_CONTROLLED_CONFIG lookup type using the Manage Standard Lookups FSM task.
Lookup Details
Use the taxPartnerRegistrations REST API to register the APIs to validate the registration numbers with the appropriate tax authority.
For India{
“OperationName”: “registerTaxPartner”,
“ConnectionPassword”: “<enter password provided by third-party service provider>”,
“ConnectionUserName”: “<enter username provided by third-party service provider>”,
“EndpointURL”: “<enter endpoint URL provided by third-party service provider>”,
“TaxPartnerName”: “GST_IN”
}
For European Union (EU) countries{
“OperationName”: “registerTaxPartner”,
“EndpointURL”: “https://ec.europa.eu/taxation_customs/vies/rest-api/check-vat-number”,
“TaxPartnerName”: “VAT_EU”
}
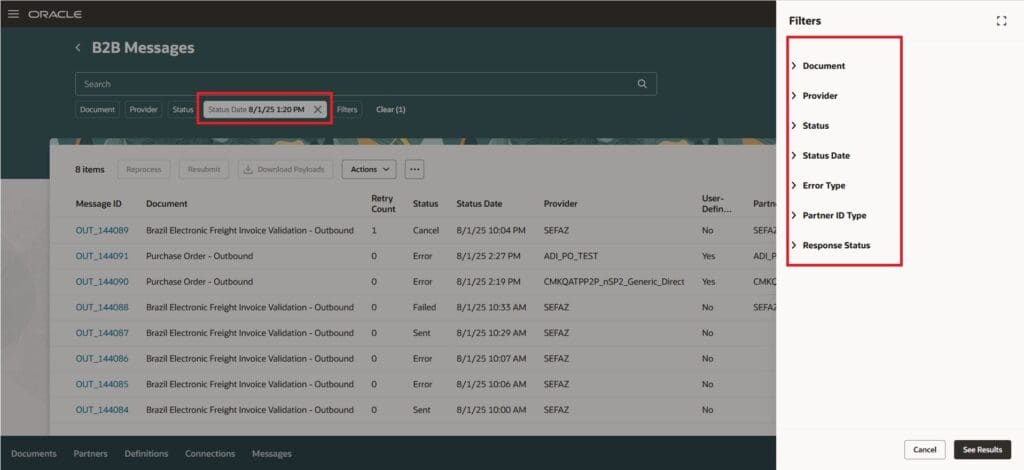
7. Redwood: Manage B2B Message History Using a Redwood Page
Quick Notes:
You can now use a Redwood page to review and manage your B2B messages.
- Select the new B2B Messages task from the task panel.
- All B2B messages from the last 24 hours are displayed by default. You can filter the messages by:
Document- Provider
- Status
- Status Date
- Error Type
- Partner ID Type
- Response Status
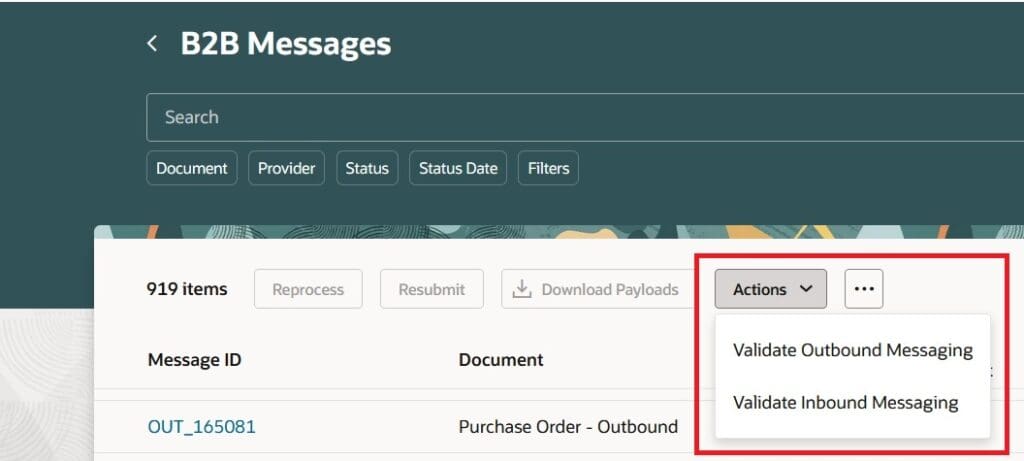
- You can perform the following actions on your messages:
- Reprocess: Reprocess a message that wasn’t sent successfully. This increases the retry count for the message delivery.
- Resubmit: Resend a message that was successfully sent or received earlier. A new message ID is generated for the message.
- Download Payloads: Download the original and transformed payload for a message. A zip file with the naming convention MessageID_Payloads is downloaded with both the original and transformed payloads.
- Delete: Delete records from when the duration or time period isn’t in effect.
- Export to Excel: Export the records to a spreadsheet.
- Cancel: Cancel messages that weren’t sent successfully so that no further action can be taken on them.
- Refresh Status: Refresh the status of a message that’s received or in-process to get the latest message processing state.
- Terminate Processing: Terminate the processing of in-process outbound POs. This can be done if the current date and time is greater than the creation date and time plus the minimum in-process duration.
- You can also validate your outbound or inbound messaging setup using the actions:
- Validate Outbound Messaging.
- Validate Inbound Messaging.
Steps to Enable:
You can access this functionality by enabling the feature Simplify Configuration and Processing for B2B Messaging or by enabling the profile option ORA_CMK_MESSAGE_HISTORY_REDWOOD_ENABLED.
Follow these steps to enable or disable this feature using the profile option:
In the Setup and Maintenance work area, search for and select the Manage Administrator Profile Values task.
On the Manage Administrator Profile Values page, search for and select the ORA_CMK_MESSAGE_HISTORY_REDWOOD_ENABLED profile option code.
In the Profile Values section, set the Site Level to Yes or No.
Yes = enables the feature
No = disables the feature
Click Save and Close.
After enabling the Redwood page, you need to log out and log in again to access the B2B Messages task from the task panel.