Oracle Fusion Cloud Benefits 26A
Medium

Feature Enablement
Redwood Features
26A Update Features Covered:
1. Redwood Experience
Cloud Benefits now supports multiple languages, so users around the world can use the app in their preferred language. This makes it easier to understand and reduces mistakes. Plus, you can translate page content directly using the Redwood Translation Editor, without switching languages or signing out.
- Benefits Life Events
- Name
- Instruction Text
- Self-Assigned Event Rule Text
- Plan Type Groupings
- Self-Service Usage
- Plan Dependency Rules
- Mutually Exclusive Plan Rules
- Configure Enrollment Action Items
- Reporting Groups
- Regulations
The editor does not auto-translate. You must manually enter translated text for each language.
2. Translation Editor Support on Redwood Benefit Pages
Quick Notes:


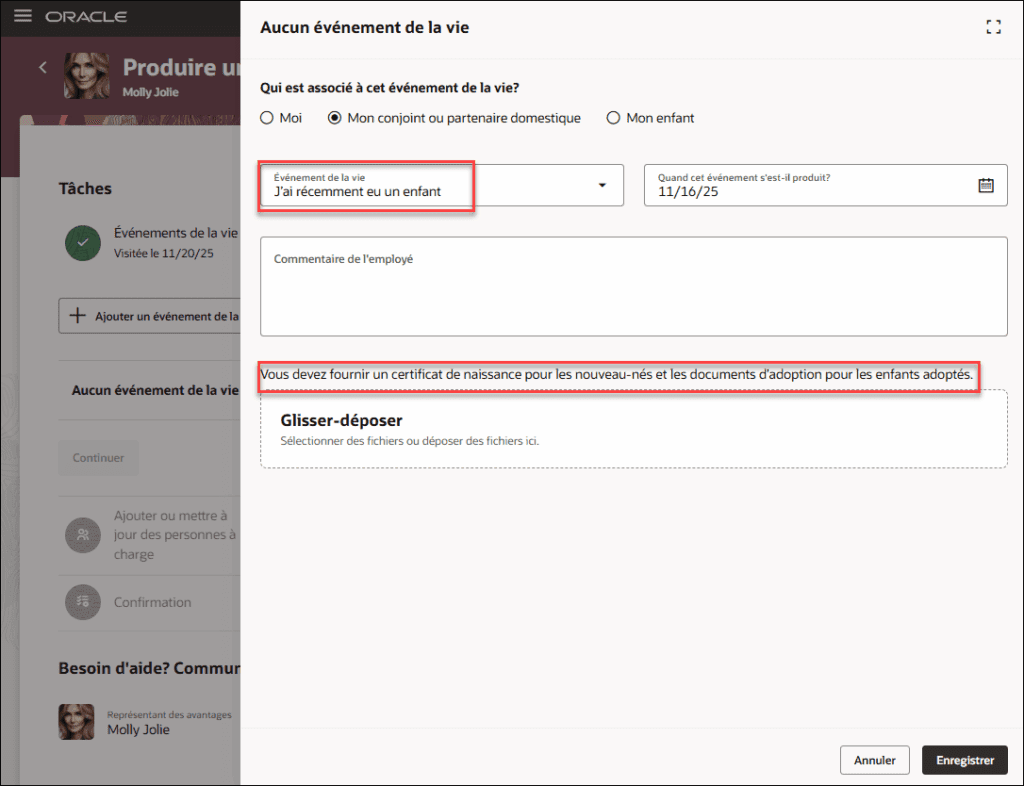
This feature lets employees and administrators view important plan details in multiple languages across all product areas. It ensures everyone understands the information consistently, reduces mistakes, and creates a smooth global experience.
Steps to Enable:
Prerequisite Steps:
Ensure that the required languages are enabled. You can view all available languages, whether they’re already installed or available for installation and translation. In the Setup and Maintenance work area, use the Manage Languages task in the Application Extensions functional area. For more information, see Language Packs on Your Application.
You need to enable these Redwood profile options.
- ORA_HCM_VBCS_PWA_ENABLED
- ORA_BEN_SELF_SERVICE_ENROLLMENT_REDWOOD_ENABLED
- ORA_BEN_ADMINISTRATIVE_ENROLLMENT_REDWOOD_ENABLED
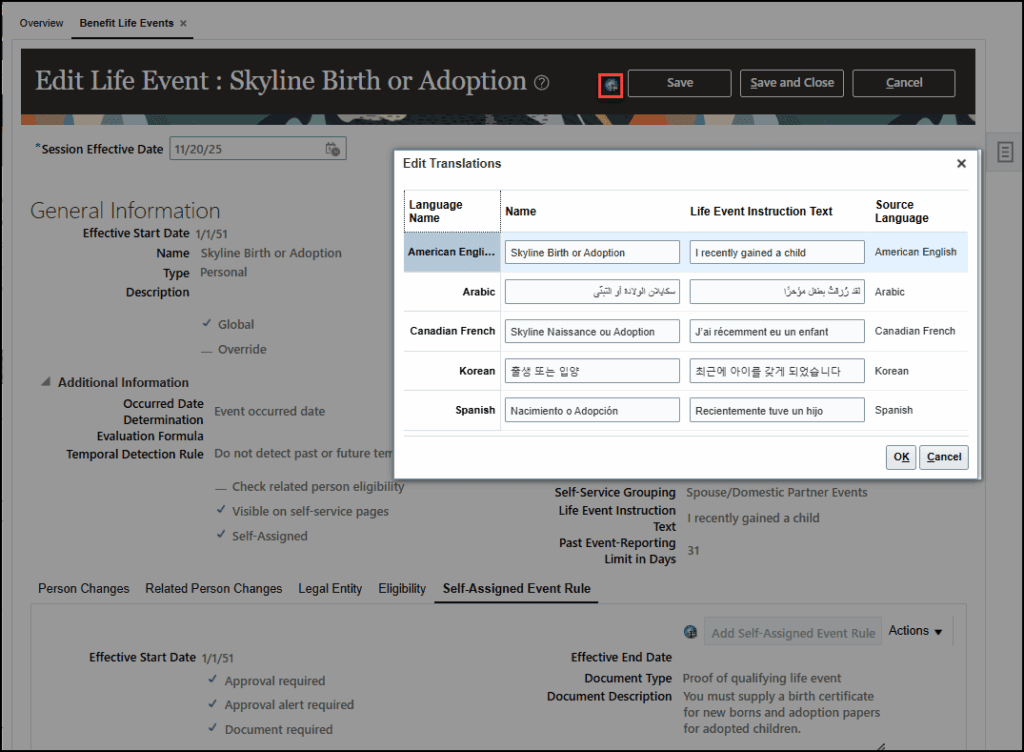
Here’s an example of how you can translate the benefits life event name and life event instruction text.
- Got to Benefits Administration > Plan Configuration > Task List > Benefit Life Events.
- Search for and open the Life Event that you want to translate.
- On the Life Event page, click the Translation Editor icon located next to the Save button.
- Do these in the translation editor window. All fields shown within the translation editor window must be completed for each selected language.
- Enter the translated Life Event Name in the Name field for the selected language.
- Enter the translated Instruction Text in the Life Event Instruction Text field for the selected language.
- Click OK to confirm your entries.
- Click Save and Close.
Tips And Considerations
- Fast Formulas and DBI will continue to use and support English names only.
- If translations are no longer needed, you may replace the translated text with the base language text to remove them.
- Translated values are retained and included during plan copy.
- The Translation Editor is disabled during update and correction modes.
- When multiple languages share the same source language, all applicable language entries are updated together.
- If an editable field is updated on the main page, the change is reflected in the translation editor window.